Bodywork Basics
By Eddie Paul Bodywork consists of all of the steps required to repair a damaged panel up to the paint prep stage. These steps include assessing the damage, grinding, repairing…
By Eddie Paul
Bodywork consists of all of the steps required to repair a damaged panel up to the paint prep stage. These steps include assessing the damage, grinding, repairing or reshaping the metal, molding and filling, and sanding the surface until it’s smooth and even with the rest of the panel.
The Logic Behind Body Repair
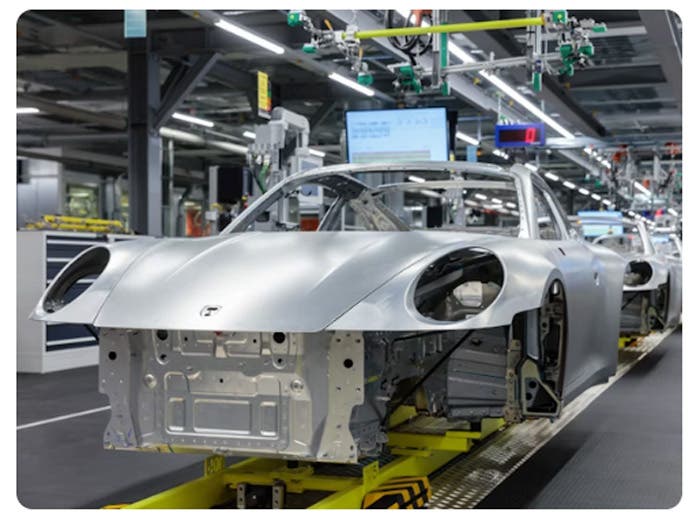
Most automobile bodies are manufactured out of flat, annealed steel plates that are stamped into their final form using large 300- to 500-ton presses. As the metal is pressed into the final shape by its solid steel male and female dies, it undergoes a bit of work hardening that helps the metal maintain the refined shape that was intended for the conclusive product. The piece is then welded or bolted together with other stamped pieces to provide the entire automobile with a stronger overall shape. Every automotive body as a whole has enormous structural integrity as well as refinement of design and function. Each gentle curve and subtle body line gives the body as much added strength and rigidity as it does styling.
In a perfect world, the autobody repair and refinishing industries would not be needed. Cars would never break or rust out, drivers would never have accidents and paint would last forever. But the truth is that auto repair and refinishing are big businesses in which many people are able to make good livings. Autobody repair, customizing and painting skills are valuable commodities in the automotive workforce.
Bodywork and painting tools and materials have evolved over the years in an effort to streamline the various repair processes and make each step easier, faster and more efficient. Where once the most sophisticated tools of repair consisted of a tape measure and a straightedge, shops now use computerized equipment with digital accuracy. The refinishing industry has also seen much change over the years. Still, in spite of the many changes, technology has not been able to eliminate the need for basic repair skills for fixing dents and spot painting panels. Much of the same tools and techniques that have been used for decades are still the best and only way to get a job done.
Anything from a wayward shopping cart or a careless swing of a car door in the grocery store parking lot, to a mild fender bender on your way to or from the store can result in a blemish to an otherwise perfect car. Depending on the severity and force of the impact, the metal could have just pushed inward slightly with only a small crease around the perimeter of the indentation. Mild damage such as this can occasionally be repaired with only some light hammer-and-dolly work, or sometimes with just a gentle push from the backside of the panel. Unfortunately, however, easy fixes are rare. Whenever the shape of metal is forcibly changed, the result is a modification of the metal’s properties at and around the area where the reshaping, or damage, has occurred. If a damaged panel exhibits any sharp bends or creases where none existed before, it’s a sure bet that the metal is stretched and cannot be pushed or tapped back into shape without getting into some refinishing work. But before we get into the process of repainting, there are several techniques and tools to cover as we discuss all of the things you’ll need to know about the basics of auto body repair.
The need for basic bodywork, or as it is also commonly referred to, “dent repair,” has been around ever since the first steel-bodied cars began to take the place of the horse and carriage. It’s very likely that the art of metal restoration dates back even further than the automobile. For instance, I’m sure that any knight in shining armor surely would not have entered into battle with an unsightly indentation in his steel suit; so the village blacksmith or whomever was responsible for bumping (“bumping” is an antiquated term for straightening or hammering sheet metal back into original form) the metal back into shape could have very well have been the medieval precursor to the body man of today. Think of the metal armor that was effectively pounded into shape back when hand tools consisted of no more than a big hammer and an anvil. How did these craftsmen shape metal with such crude tools and no formal training? And how did they make repairs?
The point is that you will not need a lot of fancy equipment to repair a dent in a car. All dealership body shops and many independent ones have state-of-the-art computerized body repair equipment that requires comprehensive training and regular updates in order to use. A heavy collision repair specialist must be certified to use these types of systems, but the reality of basic body repair work is that nothing “high-tech” has replaced the knowledge and experience that a real metal man must have. Becoming a good body man is not about having a lot of fancy tools; it’s about knowledge of how to work with metal, how to shrink it, stretch it, shape it and weld it; and most importantly, how to “read” a panel by feeling it with your hand.
Getting “The Feel” of Things
To sum things up in a few simple words, you can’t fix what you can’t feel! Therefore, the ability to feel the slightest irregularity on a vehicle’s body is the most important acquired skill of basic body repair. I’m sure that everybody’s individual sense of feel is different and some of you may not have as much sensitivity as others. But believe it or not, there is a technique to feeling a panel and, with a few tips, you, too, can get the feel of flat panels, contours and irregularities.
Feeling, or reading, a dent is a skill that one acquires through time and experience. If you can see a dent, chances are that you can also feel it. However, as a dent repair progresses, the visual element diminishes as the panel gets closer and closer to its original shape. The eye can be deceived by any number of things, so you must rely on feel.
Investigate The Damage
How was it hit? From what direction? How great was the force of impact?
These are some of the questions that a good bodyman must be able to find the answers to. Not unlike a crime scene investigation, this involves taking a close look at the damaged panel and trying to figure out how it happened. There are a lot of fascinating police dramas on television that take you into the world of forensics. Well, analyzing a dent to determine how to repair it requires a bit of autobody forensics as well. A good body man must always perform this step of diagnosis before blindly jumping in with the hammer and dolly. Although I specialize in custom work on cars and motorcycles, I have also been doing body repair work for as long as I can remember. Over the past three decades or so, I’ve gone through hundreds of employees, so I have seen the gamut of bodymen, from the “best” that can fix a dent without using any fillers to the ones that can turn a minor dent repair into a disaster by overworking the area and stretching the metal into a useless piece of scrap. Guys who start pulling and hammering before carefully analyzing the problem are the ones who rely heavily on plastic filler to fix their mess.
I used to have what I call a “flight of the imagination” theory that if you could tell exactly how a car was hit, and could reverse the damage in the exact opposite direction with the same force that made the damage in the first place, you could, with one pull, take the dent out of the car. In theory, this would work, but in practice, it does not because most bodymen are much too quick to start beating a dent out without first reading the dent to see exactly how it happened.
Was it a direct hit perpendicular to the cars axis, or was it a glancing blow or even a combination of a direct hit that glanced off of the panel? Any principle damage to a car causes collateral damage to a car. For example, if the rear fender is hit, it will affect the door gap, trunk gap and a lot of the body alignment. It can cause unseen damage to the frame or even to the suspension and drive train. A small dent can have great underlying damage potential, so don’t just look at the dent and think small. Look around and see what else might be affected by the impact. Force is the power or energy that the car was subjected to that caused the dent. You can figure that it’ll take roughly the same amount of force to pull the dent out of the car that it took to make it. This may sound simple, but keep in mind that there are numerous factors to take into consideration. In other words, you can’t just slam the backside of a dented fender and expect to fix it.
It’s safe to say that no two dents are identical. For this reason, it’s virtually impossible to categorize dents. Therefore, a bodyman must be prepared to deal with something new and unexpected when it comes to repair work. Learning the basics of bodywork is not a process that is ever really complete. But what you can learn here is that the key to fixing a dent is being able to analyze the damage and figure out how best to reverse the process.
Was it Hit Straight on, or From an Angle?
If a victim was mysteriously shot by a gun, one of the elements of solving the crime would be to determine the angle of trajectory. The same holds true when the victim is a smashed car. The bodyman can only start the repair properly if he knows from what direction the car was hit. “Now how the heck would I know this?” you ask. “I didn’t see the accident!” Let me explain how to use a bit of “impression forensics” to help you read or “reverse-engineer,” the damage. Damage assessment is usually a simple matter of applying some common-sense and logic.
If the dent is somewhat symmetrical without a scrape mark on the painted surface, all indications point to an impact from a straight perpendicular hit. If, on the other hand, the paint is scraped and the dent is non-symmetrical or pushed up on one side, the dent was obviously caused by an indirect hit, and by looking at the direction of the paint scratches as well as the shape of the dent, you can assume that the impact came from one side or the other. To be more specific, if a panel is hit from a direction other than straight on, the affected metal will be left with somewhat of a wave-like impression. The metal was pushed ahead of the impact area. If the dent is new, you can also look at the scraped paint and see which way it hit because the paint will curl up on the end of the direction of the impact.
When I first got into body repair, my unadulterated curiosity for anything related to fixing a dent had me going to the local wrecking yard to study a variety of totaled-out cars just to see if I could figure out how the accident occurred. The reason that this is so important (figuring it out, not going to wrecking yards!) is that it will help you figure out the direction that the panel must be worked as well as where to look for hidden damage. For example, if a car suffered a rear-end hit and the gap between the door and front fender is closed up, that tells you there’s much more damage than a smashed rear. Did you know that if a car is hit hard from behind, you could tell if the driver had the brakes on at the time of impact even if the car was towed from the scene of the accident (where you could have just looked for skid marks)? The clue can be found in the taillight bulbs.
The bulb filaments get soft and weak when the light is on and a sudden impact is oftentimes enough to break the filament. So by seeing which bulb is out, a sharp repairman can tell if the brakes or headlights were on. This doesn’t necessarily relate to body repair, but it proves that looking closely at certain parts of a car can tell you what it’s been through.
If you look closely, a hit on a panel will very likely cause a series of deep ridges in the metal that radiate out from the point of impact. The ridge, or crease, that is furthest away from the main point of impact is where to begin the basic body repair. A smooth undamaged sheet of metal tends to be flexible to a degree. However, once an indentation is made into that sheet, the panel becomes more rigid. A dented fender or door panel exhibits the same characteristics. Therefore, once you begin to work the creases out, the damaged panel will gradually become easier to work with. These radiant creases are actually holding the dent in. As long as you remember to work the damage from the outermost point towards the center of the impact, the metal will be much easier to hammer and dolly back into its original form.
The objective as you begin to hammer and dolly the metal is, at first, to relieve the stress of the creases and indentations. The initial body working is strictly rough-shaping until the metal is free of any sharp indentations. The goal is to work the panel back into shape without stretching the metal unnecessarily. Hammering directly at the center of the dent will cause the most stretching and make it almost impossible to return the metal back to original form. In most cases, there will be a small degree of stretch to contend with, but we’ll get into that later.
The process of body repair and painting consists of individual steps that take you progressively closer to a finished job. The number of steps and the actual techniques involved will, of course, vary from car to car. When you begin your repair, you’ll have to make the final call regarding which steps are needed and which are not. The following is a general outline of basic dent repair steps to use as a guide.
- Damage Assessment: Feel the panel. Note the exact shape of the dent, check for high spots, low spots, and any collateral damage. Until you become totally familiar with this step, you can identify specific points of the damage using masking tape and a marker. Tag the center point of the dent, the direction (if any) that the panel was hit, and the outer perimeter of the damage where you plan to start working the metal.
- Access the Damaged Panel:Remove inner panel, trim pieces, molding wherever they might interfere with your work. Save all parts and hardware for reassembly when the job is complete.
- Tool Check:Look into your tool box to make sure you have all the tools required for the job.
- Rough It In: Roughing a panel back into shape can involve anything from simple hammer-and-dolly work to attaching studs or drilling holes for slide pullers, to locating clamp points for making pulls with a hydraulic post puller or “dozer.” Extensive damage requiring anything more falls into the heavy collision repair category.
- Fine-tune the Metal Work:More hammer-and-dolly work to bring down the high spots and bring up the lows. This step requires a lot of finesse with the hammer to avoid overworking the metal. Gentle hits are all that’s needed. Hold the handle of the hammer at the midpoint or up high on the handle near the head to increase control.
- Prep for Filling:Prepping for body filler requires paint removal using a course-grit paper (36-grit) to expose bare metal. A high-speed sander/grinder can be used but the best paint removal tool is an orbital sander such as the Hutchins Model 2001 or a dual-action (DA) sander like Hutchins’ Model 3560. Filler should not be applied to anything other than clean, shiny bare metal.
- Featheredge:A good bodyman always feathers all paint edges before applying filler. The hard paint edge left from grinding must be tapered to a smooth, layered edge. This can best be accomplished with 120- or 150-grit sandpaper by hand or with the dual-action sander. A hard paint edge can get overlooked during the filler and primer applications and will show through after the paint cures.
- Applying Body Filler:The panel is ready for filling and molding as long as no high spots remain. A good- quality plastic filler such as Evercoat’s Rage Extreme will fill minor low spots, grind marks and any other imperfections in the metal. Do not overlap filler onto the featheredged paint.
- Work the Filler:The process of smoothing the plastic filler begins with rough-shaping using a “cheesegrater” file. After grating, a sanding block mounted with 36-grit paper is used to level the filler. For large panel areas, a pneumatic air file such as the Hutchins Hustler Model 2000, 2011 or 2023 can be big time-savers. Follow up with block-sanding with 80-grit paper and the once-damaged area is ready for the first application of primer.
- Paint Prep or Perfection:At this point, the job can be handed off to the painter to begin the process of preparation for paint. Some body repairmen strive for perfection by taking the block-sanding stage one step further with 180-grit paper. This is a good thing!
Roughing It In
Most body damage will require some type of pushing or pulling device that can exert a force close to what was exerted when the damage occurred. This equipment can range from a basic slide hammer to large hydraulic equipment. In the middle-range of such body tools is a portable power jack, otherwise known as a Porto-Power. This tool can perform many of tasks, but its primary talent is undoing the main force that caused the damage. It must be applied in the opposite direction of the damaging impact. Porto-Powers have become very affordable over the last few years. I remember the first set that I bought cost so much I had to make payments on it! Now you can get a fairly good-quality unit for a little over $100. Many of them come with a set of extensions and ends made to access those hard-to-reach areas. For a bit more money, you can get a “push-pull” system that will allow you to pull with the same tool.
Grinding the paint down to bare metal without heating it up is an art in and of itself. Grinding is a method of using a coated abrasive disk on a high-speed sander/grinder to tear the paint away from the metal. The disks utilize very small irregular abrasive particles glued to a disk in a gouging scraping motion called grinding. This method is fast, very effective and removes the paint in short order. However, the evil by-product of such friction is heat, and too much heat will cause the metal to expand and distort. This distortion is mostly temporary but partially permanent; the metal expands to a point when heated and contracts most of the way when it returns to normal temperature. Notice that I said “most of the way.” The problem is, once heated and cooled, metal will still remain a little bit larger than it started out. That’s why when a car catches fire, all the panels buckle out of shape.
Reshaping the Metal
As you work the dent, you will find the areas that need work getting smaller and smaller.
The tool selection must coincide with the progress of the work. No more heavy hammers or dollies are going to be needed if you did the job correctly. Depending on the quality of the roughing job you did, you could be down to very light well-placed taps instead of hard generally placed hits, so a set of finishing hammers with polished heads as well as a slapping spoon would be handy as well.
Once you notice the high and low spots begin to level out, you can either start filling the lows spots with a good-quality filler, or continue working the metal until little or no filler is required.
How do you get a feel for a low spot and what do you do about high spots? Well, this is where the “art” of bodywork comes in and “the feel” in effect becomes your guide, whereas the spraying on of a guide coat will give you a visual indicator of high and low spots by showing you where the sander went through the filler (showing the high spots) and where the sander did not touch the black guide coat (showing you the low spots).
You should learn to get the feel for high and low without having to look at the area — that is unless you are the one in a million that can see the high and low spots without feeling them. This is very possible with a surface that is painted and glossy or even wet, but as soon as the surface is sanded or multicolored it will be all but impossible to see the high and low spots.
My shop manager, Brian Hatano, has a method of showing his helpers how he can feel the high and low spots. He will have them guide coat an area and then rub his hand across the surface and tell them where the high and low spots will appear without looking. Then he has them block sand the area and, sure enough, the metal shows where he said it will be high and the black paint stays where he said it will be low.
This leads me to an idea that you might try…I can’t help it, it’s the inventor in me! When you are block sanding an area, try marking what you think will be a low spot with a spray can of black guide coat and do not spray the areas that you think will be high spots. After sanding, see what the results are. If the paint remains untouched, then you have the feel. If not, keep practicing because a custom fabricator or bodyman without the feel is like a blind guide on a mountain climb. You have to be able to feel the metal to know what to do next or you will be working in the dark. You can train your hand just as you do with many things. This just takes a bit of dedication and time. Practicing can save you a lot of aggravation down the road.
When Is It Time For Primer?
This is really a loaded question; the work is ready for a coat of primer when it is straight and smooth and no sooner. Many bodymen are too anxious to prime a job and will sometimes bury a dent, either intentionally or unintentionally, with a heavy coat of primer thinking it will fill in the imperfections and that all will be good when the paint goes on. A good painter will catch this potential for problems, but if he doesn’t, these “buried mistakes” will definitely come back to haunt both bodyman and painter as the thick primer shrinks.
There are no shortcuts and you should not rush to apply primer to the body unless it is absolutely ready to prime. When mixing and applying primer, always read and follow the manufacturer’s recommendations for reduction, spraying tips and drying times. You can also choose a good-quality aerosol primer such as those offered by Evercoat. We use Evercoat products on a regular basis in my shop with excellent results. If the area to prime is large, you’ll most likely be better off using a spray gun. I’ll go more into gun selection later in the paint chapters, but for now, let me just say that a good-quality gun designed for primer application is recommended. I tend to favor the Devilbiss line of guns, however, there are other manufacturers such as Sata and Sharpe that will do the job with professional results. Remember, primer is not liquid filler! It is an undercoat that promotes adhesion and provides a uniform base to paint over.
Primers and primer-surfacers are designed to fill very small surface irregularities and also to help protect any exposed bare metal from oxidizing when it is in contact with the oxygen in the air. Another function is to provide a substrate (paintable surface) with one uniform color to facilitate topcoat coverage. Most undercoats are available in black, light gray, dark gray, red, and white, and some can be tinted to match the color of the topcoat. Selecting an undercoat color that is close in shade to the topcoat is recommended for ease of coverage and accuracy of color match.
An important function of a primer undercoat is to provide maximum adhesion to the bare metal and properly sanded painted surfaces; the build quality allows enough thickness for block sanding. If you look into the various companies that manufacture automotive undercoatings, you’ll find a mind-boggling array of special formulations that offer specific features such as high build, easy sanding, clog-free, corrosion resistance, flexibility and more. Unless you know what you want and need, you could easily be overwhelmed. I’m sure there are some people who miss the days of all-purpose acrylic lacquer primer that worked well for just about every job. In spite of all of the special undercoatings on the market, I still try to keep things as simple as possible in my shop by using one manufacturer — Evercoat — for all fillers and undercoats. Every paint manufacturer recommends that you stick with their system of chemicals from the primer on up. This is, of course, the surest and safest way to avoid any compatibility issues when it comes time to apply paint. For those who aren’t familiar with the compatibility of different primers and paints, I highly recommend that you use the paint manufacturer’s recommended undercoat until you become more experienced.
Another type of primer that we use is called etching primer (also called acid-etch primer).
As its name implies, etching primer chemically bonds, or etches, into the bare metal with the added ingredient of phosphoric acid. This special primer is used where corrosion problems exist, or when working with metals such as aluminum. Etching primer is not compatible with some sealers, primers and topcoats, so be sure to investigate compatible products before using it. Epoxy primers, or two-part catalyzed primers, cure through a chemical reaction, as opposed to solvent evaporation, when exposed to air. A catalyzed primer forms a good barrier coat between chemically unstable substrates and the topcoat. Other benefits include less shrinkage and excellent rust-inhibiting qualities.
Electrostatic primers are what most of the factories use. The application process involves dipping the car body into a large tank of liquid primer while an electrostatic charge is sent through the body of the car, which alters the chemical properties of the liquid. The body is then cured in large ovens at about 350 degrees F until it is fully cured. This process delivers primer to every square inch of the metal’s surface and requires no sanding. There is no better method of covering the base metal of the car for extended protection but, unfortunately, it is almost impossible to perform this process without dipping the car in a large tank. This is why the best substrate to apply paint over is a properly sanded factory paint job.
Zinc chromate primers are basically used for aluminum or in any application where dissimilar metals are used together and have the potential of creating electrolysis. This type of primer acts as an insulator that prevents the metal from carrying a charge from one alloy to the next. Zinc chromate is used in many aircraft and marine applications and on exotic aluminum-bodied cars.
An anti-chip primer is the soft coating that is applied on many cars along the rocker panel area and in the wheel wells. It normally cannot be applied over bare metal. Its sole purpose is to absorb the impact of road debris that might otherwise chip the paint. It is normally applied with a rough surface texture.
Surfacers are simply the primers that are applied over the base primer and are also intended as fillers when applied in very thick high-build coats. Surfacers are formulated to provide excellent bonding with primer.


